🛒 What You'll Need

Raspberry Pi
Model 3, 4, or 5. Any will work. You'll also need a power supply and a microSD card with Raspberry Pi OS installed.
Required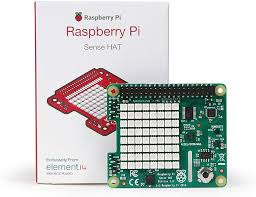
Sense HAT
The official Raspberry Pi Sense HAT add-on board. It plugs directly onto the Pi's GPIO header — no soldering needed.
RequiredUSB Mouse
Any standard USB mouse. This is your Morse code input device.
RequiredHDMI Display
A monitor or TV with HDMI input to see the fullscreen interface.
RequiredSpeaker
Connected via the 3.5mm audio jack or HDMI. Needed for beep sounds and text-to-speech.
RecommendedUSB Keyboard
For initial setup and the optional keyboard mode. Not needed for Morse code input.
Recommended📦 Installation
Step 1 — Clone the Repository
Open a terminal on your Raspberry Pi and run:
Step 2 — Install Python Dependencies
Install the required Python libraries:
Step 3 — Install espeak (TTS Fallback)
This provides a backup text-to-speech engine:
Step 4 — Run the Application
Start the Morse code system:
The application will launch in fullscreen mode. You're ready to start clicking Morse code.
🔄 Auto-Start at Boot (Optional)
Want the Morse code system to start automatically when you power on the Pi? Run:
This creates a systemd service that launches the application on every boot. To disable it later:
✅ Quick Test
Try spelling "HI" in Morse code to verify everything works:
Click the left mouse button four times quickly. You'll hear four short beeps. Wait 1.5 seconds — the letter "H" appears on the LED and screen.
Click twice quickly. Wait 1.5 seconds — "I" appears. Now right-click to complete the message. The Pi will say "Message complete: HI" and play the Mario tune.
🔧 Troubleshooting
No LED display?
Make sure the Sense HAT is firmly seated on the GPIO pins. The system will continue to work without it — check the HDMI screen for output.
No sound?
Check your audio output setting with raspi-config. Try both the 3.5mm jack and HDMI output. Make sure the volume is up.
Import errors?
Re-run pip3 install sense-hat pygame pyttsx3 numpy. On some Pi OS versions you may need sudo apt-get install python3-pygame.
Display orientation wrong?
The code sets sense.set_rotation(270). If letters appear sideways, try changing this to 0, 90, or 180 in the source code.
🌟 Ideas to Extend the Project
Once you have it running, here are some fun ways to make it your own:
Custom Colours
Change the LED colours for different letters or add a rainbow mode.
Custom Tunes
Replace the Mario tune with your own melody. The note format is simple: (frequency, duration).
Speed Challenge
Add a timer to see how fast you can spell words in Morse code.
Learning Mode
Show the Morse code for a random letter and ask the user to input it correctly.
Network Mode
Send Morse code messages between two Raspberry Pis over the network.
Statistics
Track accuracy, speed, and most-used letters. Display stats on the screen.
Ready to build? Grab the code and start clicking.
⭐ View on GitHub